How to Back and Frame Your Cross Stitch Like a Pro
You’ve stitched the last ‘X’, ended your thread, and admired your work, now it’s time to give your masterpiece the finishing touch. In this guide, we’ll show you exactly how to back and frame your finished cross stitch using the backing fabric and hoop included in every Innocent Bones kit.
Whether you’re displaying it proudly on a shelf, gifting it to a mate, or hanging it as a reminder of your creative superpowers…here’s how to frame it like a pro.
Step 1: Smooth Out Your Fabric
Before you frame your piece, it’s best to remove any creases or hoop marks.
Here’s how to safely iron your finished cross stitch:
-
Place your fabric face down on a soft towel to protect the stitches.
-
Set your iron to a medium heat (no steam) and gently press on the back of the fabric.
- Avoid ironing directly over the stitches or using high heat – you want to flatten, not fry!

Step 2: Re-Centre and Tighten in the Hoop
Take the wooden hoop from your kit and place the backing fabric behind your finished piece. This will give your work a clean, professional look from the back.
-
Loosen the hoop slightly, then place your finished design on top of the backing fabric and sandwich between the hoop.
-
Adjust the fabric until your design is centred in the hoop.
-
Once you’re happy, tighten the screw firmly. You can even use a pair of pliers to secure it in place.
💡 Top Tip: Pull the edges of the fabric gently as you tighten to keep everything smooth and taut.

Step 3: Trim the Edges
Turn the hoop over so you can see the excess fabric on the back. Using sharp scissors:
-
Cut the fabric into a circle, leaving about 1–2cm of fabric around the edge of the hoop.
-
Don’t cut too close – you’ll need that extra edge for stitching in the next step!
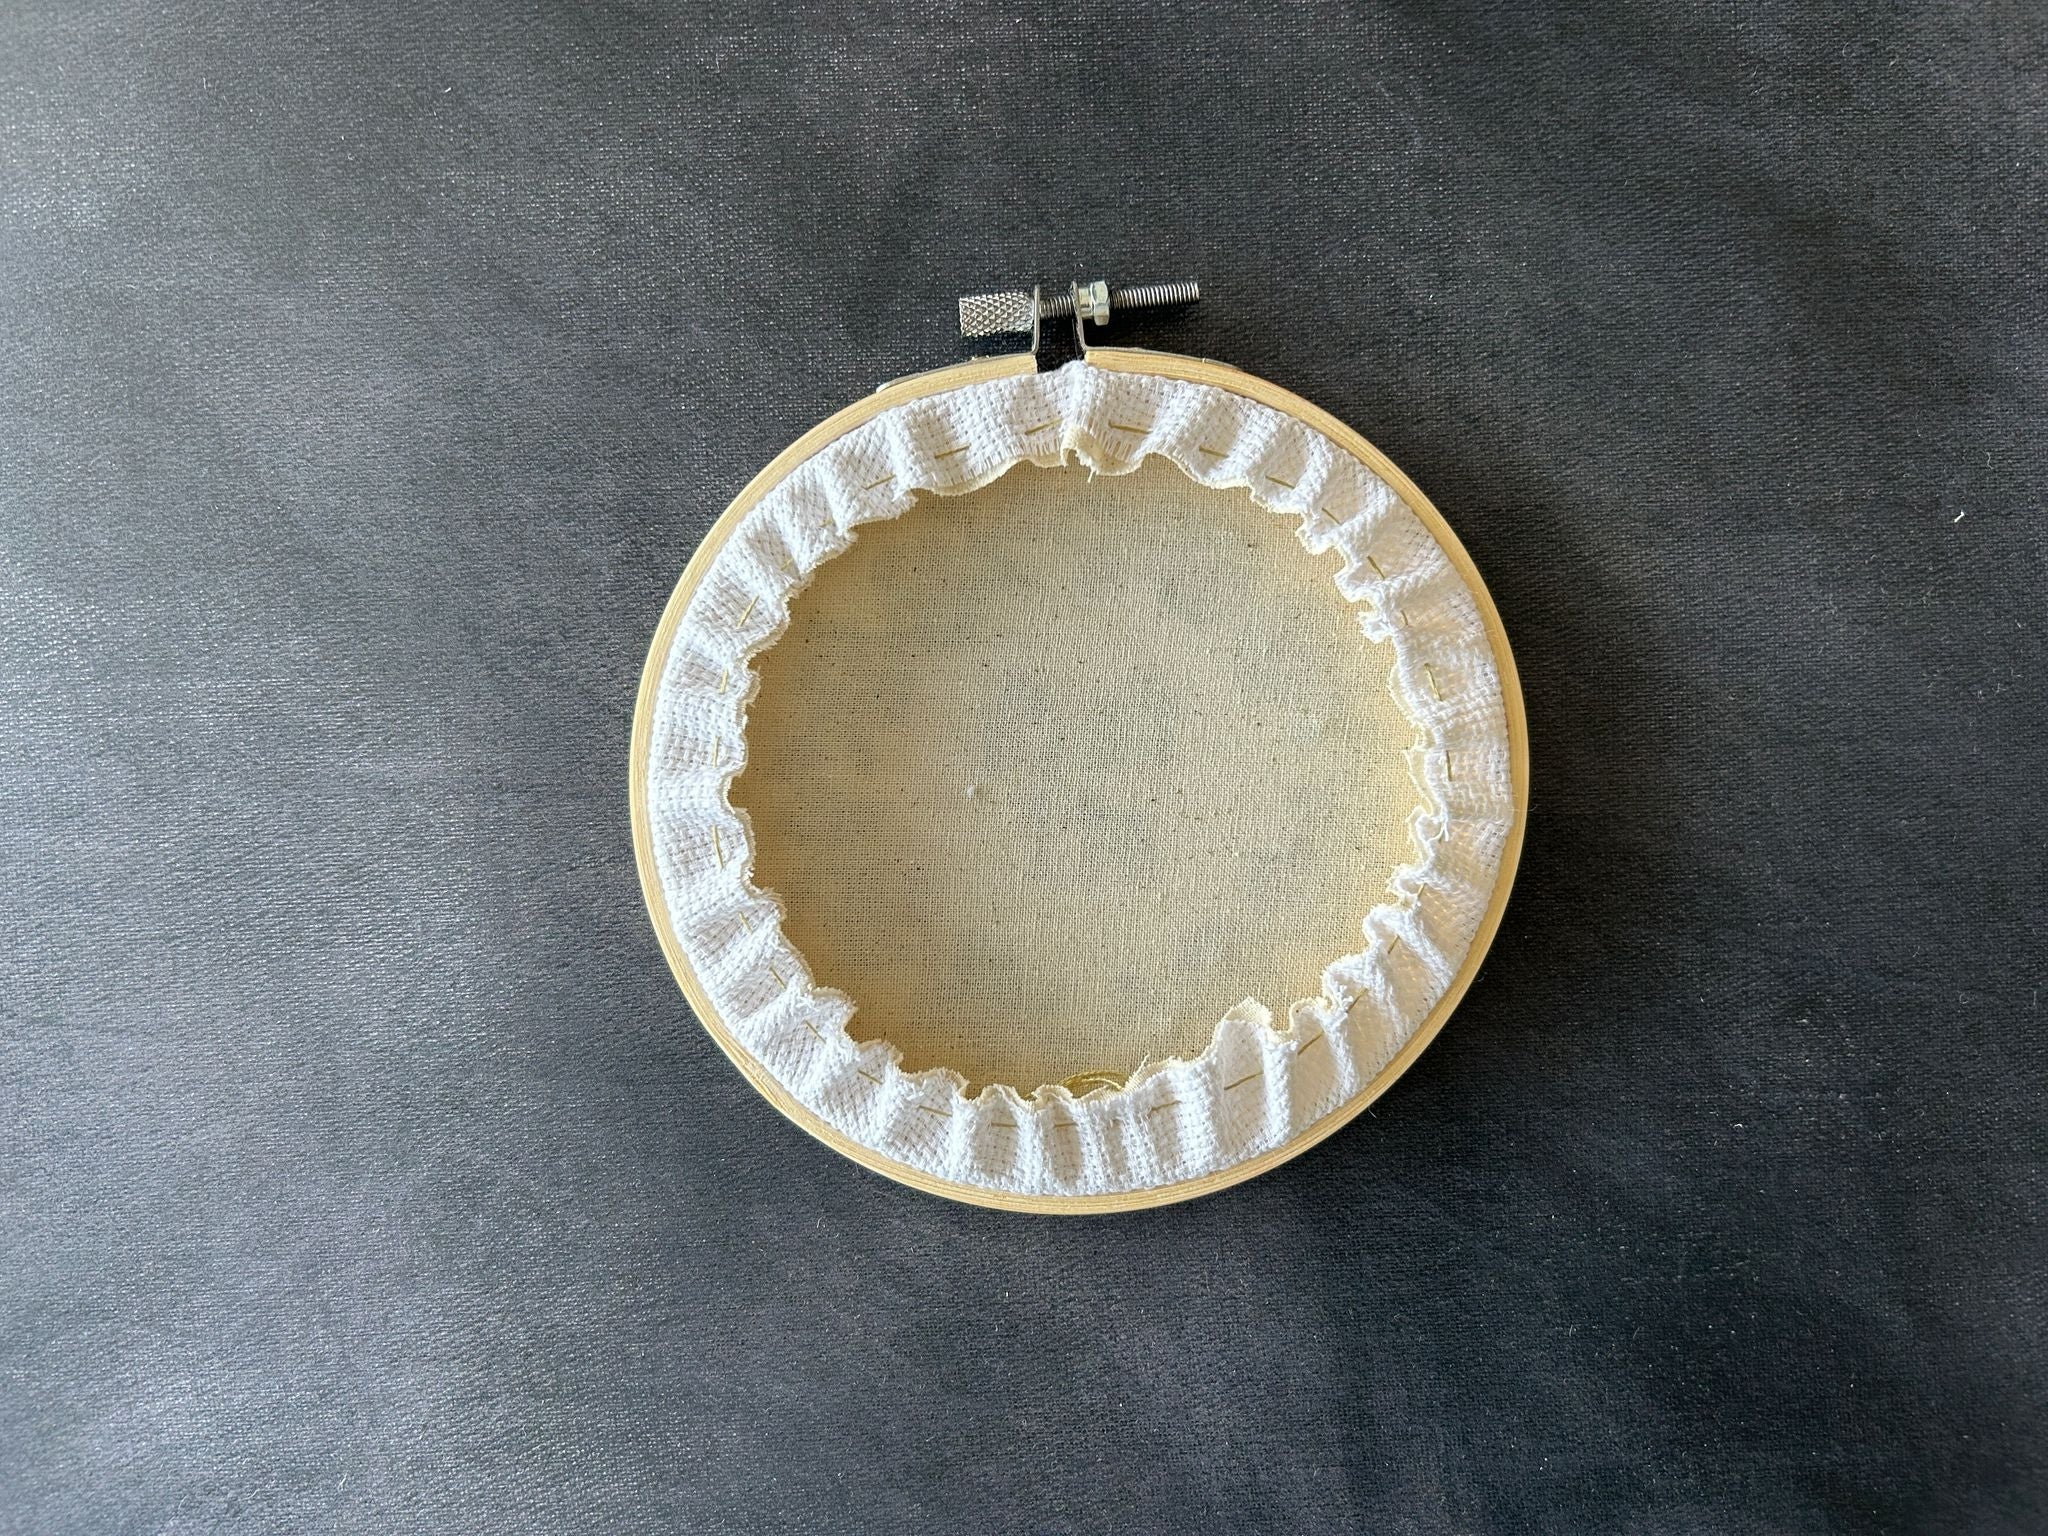
Step 4: Stitch Around the Back
Thread your needle one final time – promise this is the last bit!
-
Use a simple running stitch all around the edge of the fabric circle.
-
Once you’ve stitched the full way around, gently pull the thread to gather the fabric neatly at the back.
-
Secure with a small knot and snip the excess.
This little finishing stitch keeps everything tucked in and gives your hoop a tidy look from behind.

Step 5: Display and Admire
That’s it – your cross stitch is ready to shine ✨
You’ve created something with your own hands, backed it beautifully, and now it’s ready to hang, gift, or keep as your own little slice of calm.
💬 Got a hoop you're proud of? Tag us on Instagram @_innocentbones – we love seeing your finished work.
More Cross Stitch Tips You’ll Love:
-
Must-Have Cross Stitch Accessories (and Why You’ll Love Them)
-
Why Mindful Makers Love Cross Stitch – And How To Get Started
-
How to Read a Cross Stitch Pattern (Without Losing Your Mind)